- Teczka (Do odebrania za darmo w dziekanacie)
- Czytelne, drukowane litery napisane grubym czarnym markerem (grubość 1mm max)
- Przy wybranej formie pracy na pierwszej stronie dopisać tryb studiów (S - Stacjonarnie, N - Zaoczne (Niestacjonarne))
- Wydrukowana praca dyplomowa
- Kolor dowolny, nie musi być kolorowy, może być czarno-biały
- Strona tytułowa zgodna z wzorem (Jedyna strona w oryginalnej wielkości!)
- Druk dwustronny, dwie strony na jednej stronie (4 strony na jednej kartce, dwie po jednej stronie, dwie po drugiej po drugiej, przewrót wzdłuż dłuższego boku)
- Koperta (nie musi być B5, może być C5) wraz z płytą na końcu teczki (Płyta oraz koperta podpisana: imię, nazwisko i numer indeksu) - NIE ZAKLEJAMY KOPERTY
There was a reddit post about installing Arch on NTFS3 partition. Since Windows and Linux doesn't have directories with same names under the /
(C:\
), I thought it's possible, and turned out it was actually possible.
If you are not familiar to Linux, for example you've searched on Google "how to dualboot Linux and Windos" or brbrbr... you mustn't try this. This is not practical.
- UEFI system
- Any Linux live-boot CD/DVD/USB... with Linux kernel newer than 5.15
- Windows installer USB
Better tutorial (a little bit more complicated): https://gist.github.com/karolba/a3f1c5f8d50c67f5a19e6c8f38e53e12
- Download the "virtual" type aarch64 ISO file from https://www.alpinelinux.org/downloads/ with wget
- Execute
sudo dd if=alpine.iso of=/dev/sda
- On the Oracle Cloud panel, setup a console connection and connect to the serial console.
- Execute
sudo reboot
- When Alpine is launched and you are logged in as root, execute these commands in the serial console:
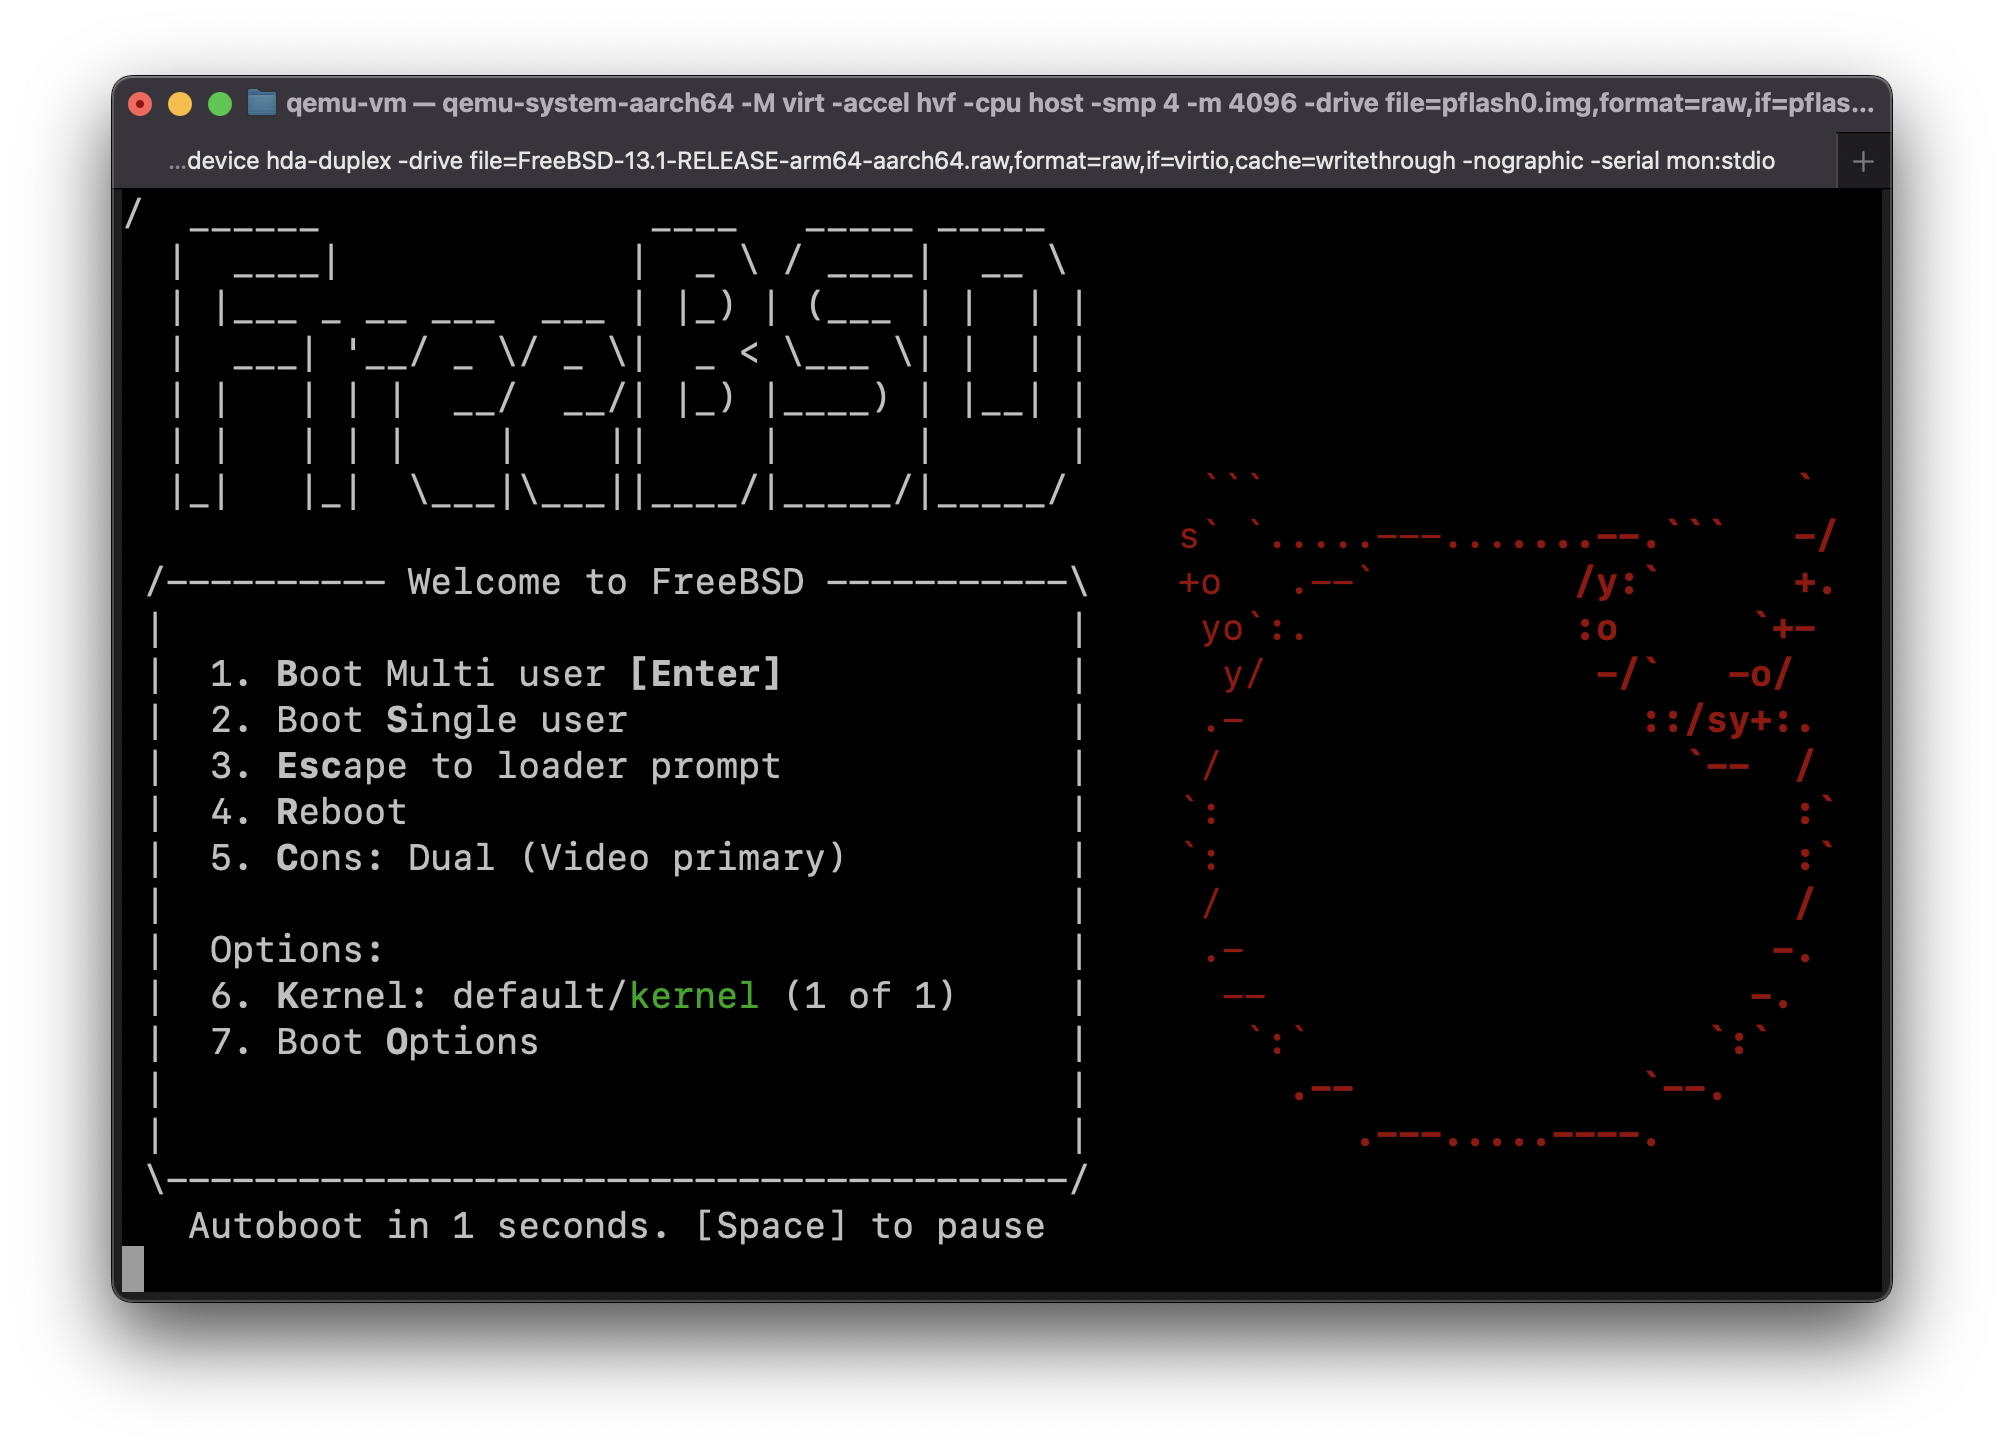
Guide: Run FreeBSD 13.1-RELEASE for ARM64 in QEMU on Apple Silicon Mac (MacBook Pro M1, etc) with HVF acceleration (Hypervisor.framework)
This guide was adapted from https://gist.github.com/niw/e4313b9c14e968764a52375da41b4278#running-ubuntu-server-for-arm64
- Install Xcode from App Store or install Command Line Tools on your Mac running on Apple Silicon.
Use this better tutorial: https://gist.github.com/karolba/a3f1c5f8d50c67f5a19e6c8f38e53e12
- Reboot into the rescue image
- Then execute these commands:
cd /dev/shm
mkdir alpine
cd alpine
/* | |
* This document is provided to the public domain under the | |
* terms of the Creative Commons CC0 public domain license | |
*/ | |
How to boot Arch Linux ARM in QEMU (patched for M1) | |
Prerequisites: | |
QEMU - patched for M1 processors - patches: https://github.com/utmapp/qemu |
#include <stdio.h> | |
#define $x ,x | |
#define $i ,i | |
#define eval int | |
#define read scanf | |
#define $scanfpat "%d", & | |
#define $(x) ,(x) | |
#define $open ( | |
#define $close ) | |
#define do { |
Some hosting providers like scaleway allows to remove the IPv4 from the VPS in order to save 1€/month
but doing this will result in losing connectivity to the "IPv4 world".
Or you may have ordered a VPS that only has IPv6 connectivity and you want to access to a resource only accessible from the "IPv4 world".
Here is how to gain your access back to the "IPv4 world".
Note: You may deploy your own DNS64 & NAT64 server on a separate server by following this tutorial (untested): https://packetpushers.net/nat64-setup-using-tayga/.
Note²: You may find a explanation of what is NAT64 and DNS64 on Wikipedia.
- Choose a/multiple DNS64 public server(s) that has/have its own NAT64 public service from this list:
#!/bin/sh | |
# Wrapper script around yay to try to ignore errors | |
# Copyright © 2019 Ashkan Kiani | |
# This program is free software: you can redistribute it and/or modify | |
# it under the terms of the GNU General Public License as published by | |
# the Free Software Foundation, either version 3 of the License, or | |
# (at your option) any later version. | |
# This program is distributed in the hope that it will be useful, |
<?php | |
// This works best on Apache, and if you have enable_post_data_reading off. | |
// Set "php_flag enable_post_data_reading off" in your htaccess. It'll avoid having to parse multipart forms. | |
// enter the sock to connect to here | |
const SOCK_TO_CONNECT_TO = './run.sock'; | |
// Close the session right now, because it might make everything faster, and we don't know how long the response will last for. | |
session_write_close(); |